

Crocheting flowers is a delightful and rewarding craft that can add a touch of beauty to various projects, from accessories to home decor.
Whether you’re looking to embellish a hat, create a bouquet, or simply practice your crochet skills, Crocheting flowers is a fantastic way to express your creativity. In this comprehensive guide, we will explore the process of crocheting a flower, including the popular Hicrochet.com technique, which offers a unique approach to flower-making.
Understanding the Basics of Crocheting Flowers
Before diving into the steps, it’s essential to understand the basic concepts of crocheting flowers. Flowers can be made in various styles, sizes, and colors, allowing for endless customization. The Hicrochet technique, which focuses on creating intricate designs using a combination of stitches, is particularly popular among crocheters.
Why Crochet Flowers?
Crochet flowers are not only beautiful but also versatile. They can be used in various ways, such as:
- Embellishments: Add flowers to hats, scarves, bags, or clothing for a personalized touch.
- Home Decor: Use flowers to create wreaths, centerpieces, or wall hangings.
- Gift Items: Create unique gifts, such as flower bouquets or decorative pieces for special occasions.
- Craft Projects: Incorporate flowers into other crafts, such as card making or scrapbooking.
- Accessories: Prepare some accessories for Crochet
Materials Needed
Before you start crocheting your flower, gather the following materials:
- Yarn: Choose a yarn that suits your project. Cotton yarn is often preferred for flowers due to its durability and ability to hold shape.
- Crochet Hook: Select a hook size that corresponds to your yarn weight. For example, a 4mm hook is suitable for worsted weight yarn.
- Scissors: For cutting your yarn.
- Tapestry Needle: For weaving in ends and securing your work.
- Step-by-Step Guide to Crocheting a Flower
Step 1: Create a Magic Ring
- Make a Slip Knot: Start by making a slip knot on your crochet hook. This will be the starting point for your flower.
- Chain Stitches: Chain a specific number of stitches based on the flower pattern you are following. For a simple flower, you might start with 4-6 chains.
Step 2: Form a Ring
- Join the Chain: To create a ring, slip stitch into the first chain stitch you made. This forms the center of your flower.
- Secure the Ring: Pull the tail of the yarn to tighten the ring slightly, ensuring it holds its shape.
Step 3: Work the First Round
- Single Crochet: Work a specified number of single crochet stitches into the ring. For example, you might make 6 single crochets. This will create the base for your petals.
- Join the Round: Slip stitch into the first single crochet to close the round.
Step 4: Create the Petals
- Begin Petal Formation: In the next round, you will create the petals. For each petal, you will typically work a combination of half double crochet and double crochet stitches.
- Work Petals: For example, you might chain 1, then work 1 half double crochet, followed by 3 double crochets, and finish with another half double crochet in the same stitch. This creates one petal.
- Repeat: Continue this process around the ring, working one petal in each stitch until you have the desired number of petals.
Step 5: Finish the Flower
- Join the Last Petal: After completing the last petal, slip stitch into the top of the first petal to join.
- Fasten Off: Cut the yarn, leaving a tail for weaving in. Pull the tail through the last loop to secure it.
Step 6: Weave in Ends
- Use a Tapestry Needle: Thread the tail onto a tapestry needle and weave it through the back of the flower to hide the ends.
- Trim Excess Yarn: Cut any excess yarn to ensure a clean finish.
Variations and Customization
One of the best things about crocheting flowers is the ability to customize them to your liking. Here are some ideas:
- Change the color: Use different colored yarns for each round or create a gradient effect by changing colors every few rounds.
- Experiment with textures: Try using a textured yarn or adding beads or sequins to your flower for added interest.
- Adjust the size: Make your flower larger or smaller by using a different hook size or adding/subtracting rounds.
- Create a center: For a more realistic look, crochet a small circle in a contrasting color and attach it to the center of your flower.
Incorporating Crocheted Flowers into Projects
Now that you’ve mastered the art of crocheting flowers, it’s time to put them to use! Here are some ideas:
- Embellish clothing: Sew or glue crocheted flowers onto hats, scarves, bags, or even sweaters for a unique touch.
- Decorate home decor: Add crocheted flowers to pillows, wreaths, or even picture frames for a handmade flair.
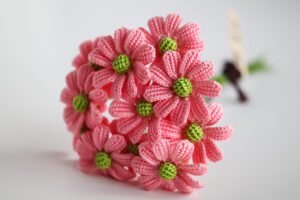
- Create bouquets: Crochet an assortment of flowers in different sizes and colors to create a beautiful bouquet.
- Make greeting cards: Glue crocheted flowers onto handmade cards for a special touch.
Conclusion
Crocheting flowers is a fun and creative way to add a personal touch to your projects. With the Hicrochet method, you can easily create beautiful blooms that will elevate your creations. Remember to experiment with different yarns, colors, and sizes to find what works best for you. Happy crocheting!
Read more:
6 Steps to Guide you How to crochet a flower